THIS POST HAS BEEN EDITED AS OF 1/7/2012
I found this great video from a wonderful woman who has great videos that will teach you how to make real Mexican food. Please see this video on how the bread the Chiles, I have left the way I do it in so you can choose which one you want to try. I am yet to try this new method, but will likely switch to it as it makes much less of a mess.
WARNING: Careful where you put your hands while making this, and if you can wear gloves.
Have you ever been to a mexican restaurant and ordered one of these?
Well, let me back up.... way back in graduate school I had the opportunity to go to Mexico to look at the overwintering site of the Monarch butterfly. Yeah, it was amazing and you should do it if you get a chance, but let me tell you what else was awesome. THE FOOD!! I specifically recall this dish I tried for the first time called the chile relleno (pronounced ray-ay-no). It was amazing so naturally when I gat back to states I wanted to eat another. I ordered one in a local "mexican" restaurant and thought it was alright but not as good as the one I had in mexico. I thought I would just go to another restaurant and see if they had better ones. A few tries later at different restaurants had me confused because no matter where I went they were all eerily the same. So I went to Mexican food mecca, Mi Cabanita to get one, but they don't sell them.
I knew something was wrong! If the Cabanita doesn't sell it you usually don't want it, but I wanted one so of course I would just have to do it myself.
I enlisted the help of Dr. Chiro and MutherMusk and after a few attempts I have ironed out the details of making the chiles, which are almost as good as the one I had in Mexico.
Now back to the eerily similar chiles I was getting in restaurants. Once I figured out how long it took to make these (they are worth the effort) I realized the ones in the restaurants are frozen. They are made in a factory somewhere! This epiphany explained why they were all the same no matter where I went.
Here is a list of ingredients.
Poblano Peppers
Your favorite frying oil
Your favorite rice
Onions
Your favorite meat
Masa Harina or just plain old flour
Your favorite cheeses
The lion's share of the work is done in prepping the peppers so prepare yourself.
You need to remove the skin of the pepper, but first you must blacken them to get the skin off.
Fire up your grill and roast the peppers until all the skin is black, if you don't have a grill a large pan with high heat will also work just as well.

Now that your peppers are all black you need to put them in an airtight container so they can bask in their own steamy heat for at least 10 minutes.
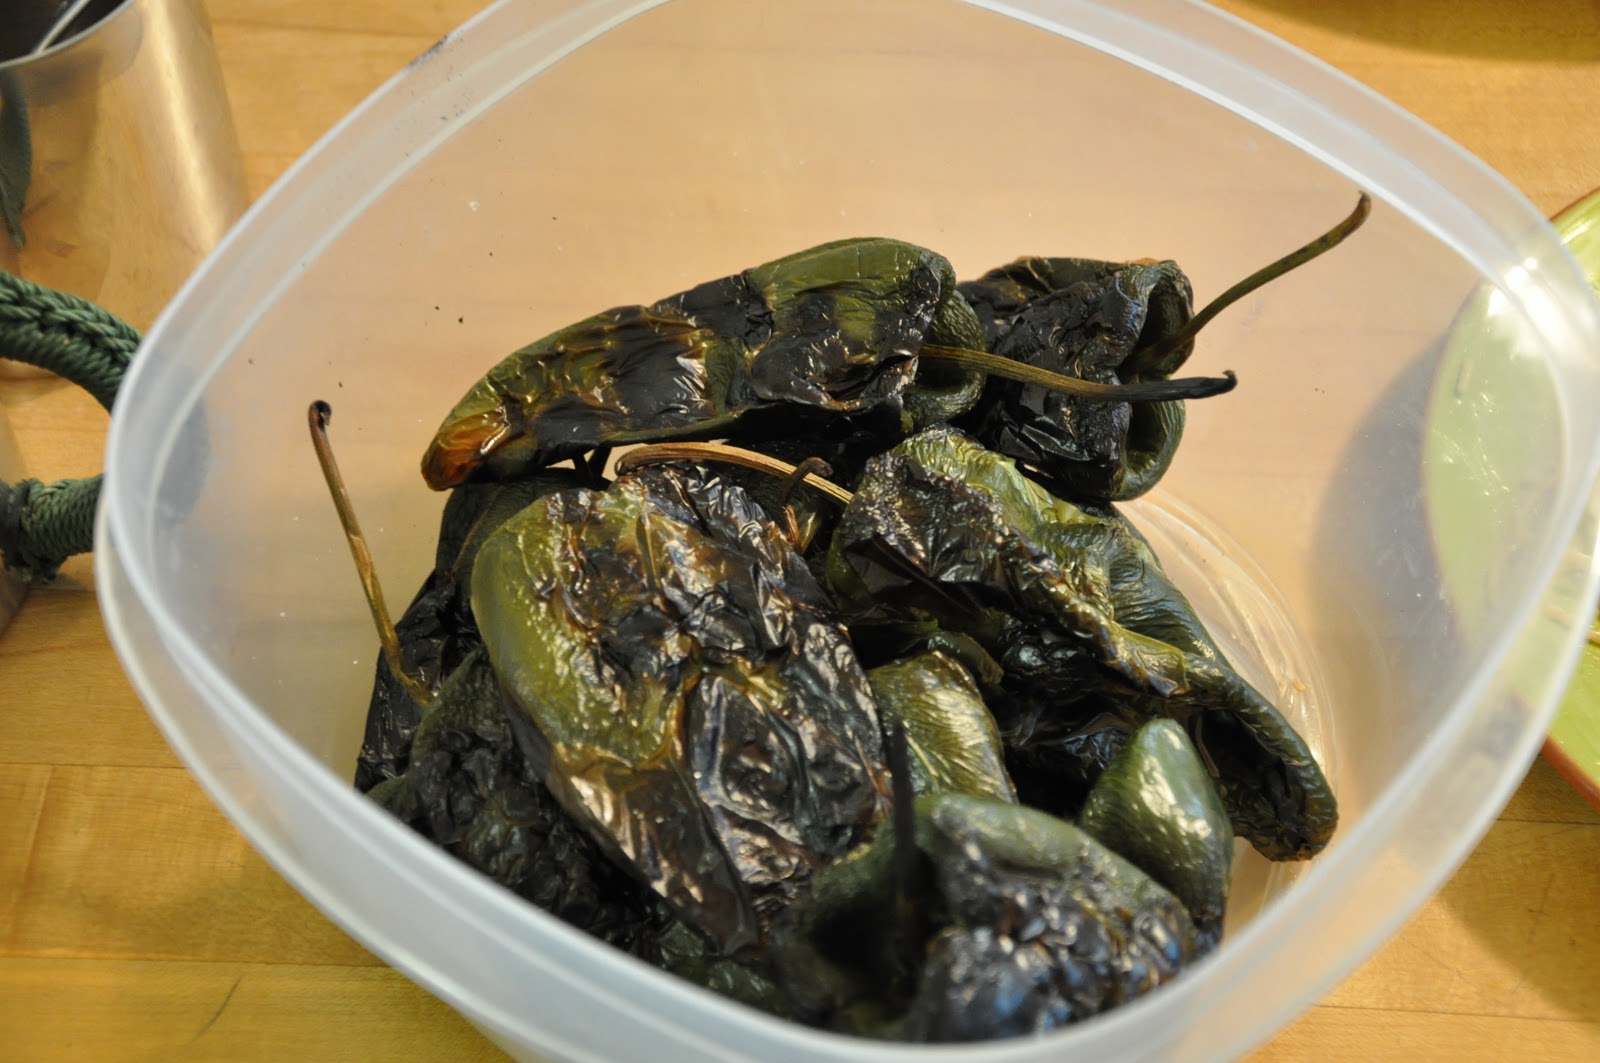
Here are the peppers in the container pre-lid.

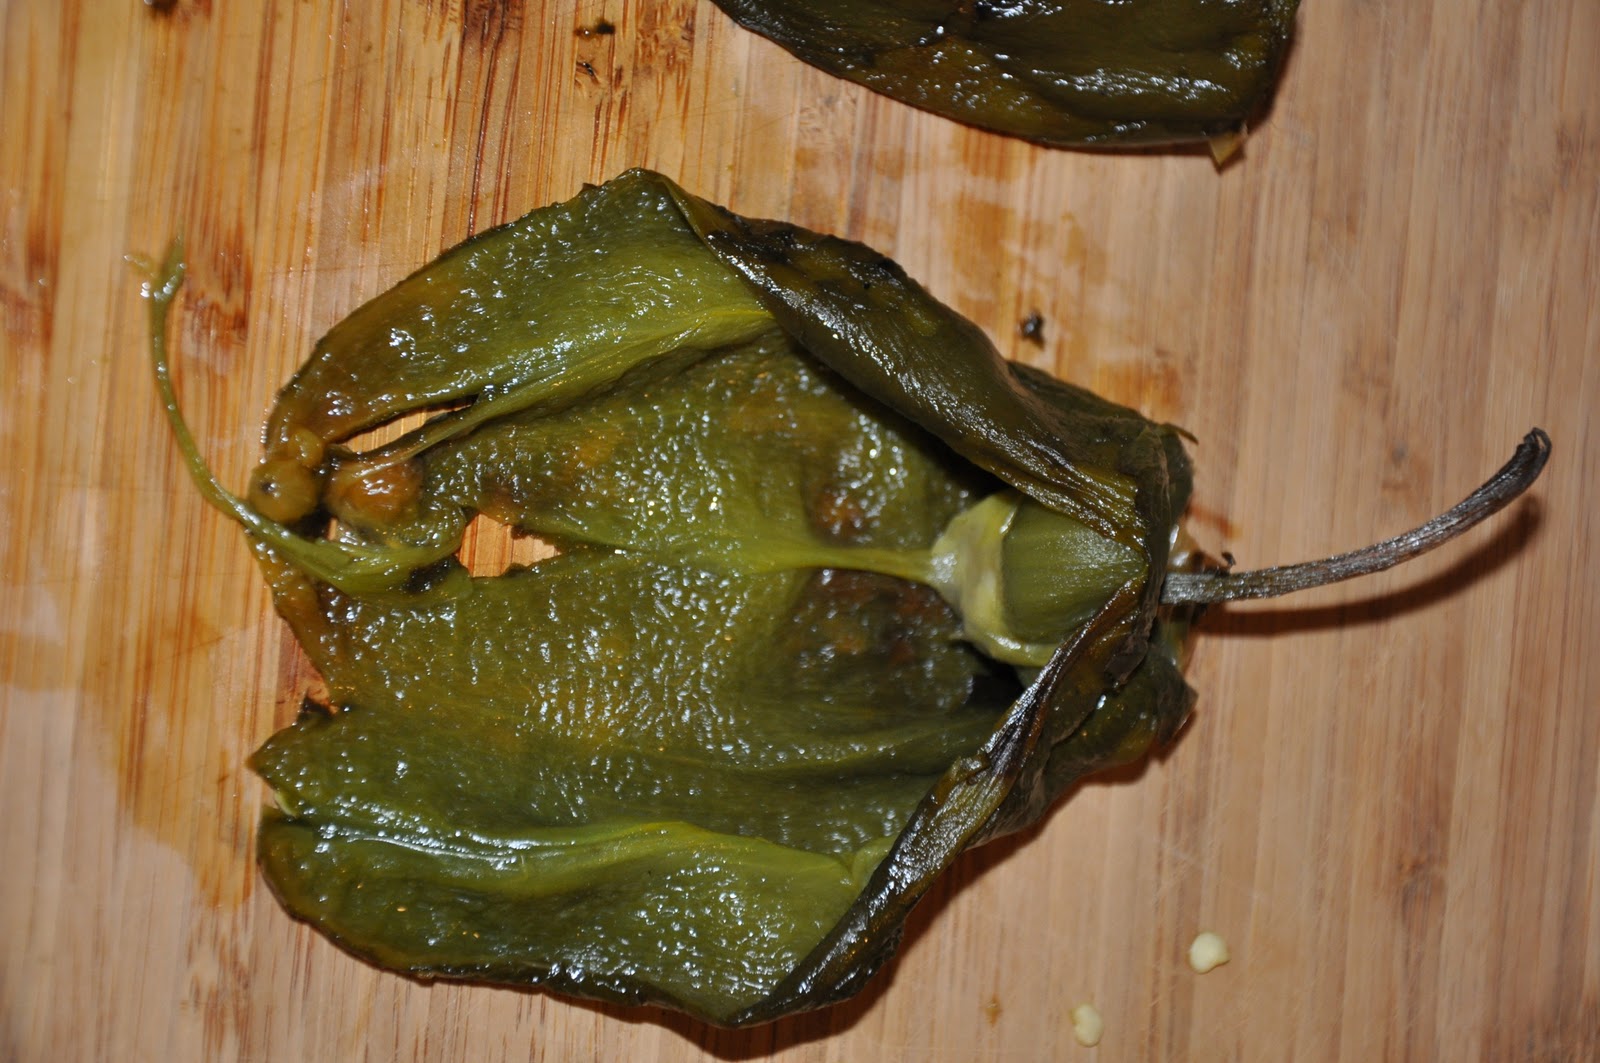
Now that your peppers have sat and are all wrinkled you need to take off their skin. Don't worry about them coming apart as you will see in this photo there is no way to take the next step of getting the seeds out without splitting them open. This is no big deal because when you fry them they will be fused back together. Below you will see a closer view of the pepper after blackening and sitting, skinning, and deseeding.


Now you can make your filling to stuff the peppers. I like to use cheese, rice, meat, and onions. I apologize for the lack of pictures, but all you do is mix your filling together in a pot. It helps if the fillings are cold, that way the fillings will pack into a pellet that will fit right into your peppers. This eliminates the the filling falling out when you are frying the peppers and rolling them in egg and flour.
Now prepare three stations of flour egg flour or if you can masa harina-egg-masa harina. Masa harina is a type of corn flour, but regular white flour works well too.

Always work in the same direction when rolling your stuffed peppers in the stations. It helps if one person can do the rolling and the other can keep an eye on your pan full of hot oil because the hands that do the rolling are going to get filthy. The first round of flour gives the egg something to stick to, and the egg then gives the next round of flour something to stick to.

Place your peppers in carefully so you don't cook yourself and let them sit for about a minute. You can then roll them over so the other side is cooked, or whilst letting them sit you can spoon hot oil on them so you don't even have to turn them. Cooking time is minimal, less than two minutes total.

Now plate your treasure and enjoy with more cheese. These are plated with MutherMusk's famous black bean and lentil soup.
It's a wise idea to make as many as you have time for. They will freeze well after you stuff them. That way when you want some next time you just defrost and fry. Just like in the restaurant.

Cleanup NOTE: I hate to waste things so I make dog treats with the leftover egg and flour. I combine all three stations into one and mix to make little dumplings. Then I put them in the hot oil until they are crispy. After removing them from the oil you can do one of two thing. You can give them to your dog, which I wouldn't advise, or you can put a bit of salt and sugar on them and eat them yourself. I recommend eating them, the salt and sugar go well with the chile flavoured dumplings.
